

For most of you and your kids, school is officially back in session! And, if not, it’s revving up to start soon. You may be wondering how you can help your mini be successful in school this year. One of the most important lessons you can teach your children is to learn to LOVE READING. Having strong reading skills will help your child their entire life! Reading helps improve writing skills, comprehension, and language building skills. In fact, research by the National Institute of Child Health and Human Development (NICHD) finds,“Reading is the single most important skill necessary for a happy, productive and successful life. A child that is an excellent reader is a confident child, has a high level of self esteem and is able to easily make the transition from learning to read to reading to learn.”
style="float:right; width:50%; margin-left:15px; text-align:center;"

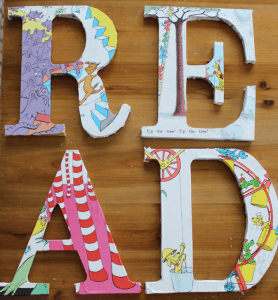
One of the ways you can encourage your child to read is to create an inviting, exciting space to do just that — READ. Today, we’re featuring DIY personalized reading nook letters to create a reading nook in your home. Whether it’s a corner of their bedroom or just a shelf dedicated to books, reading nooks emphasize the importance of reading by creating a separate space dedicated to reading. It makes reading exciting and fun! {Image via Money Saving Sisters}
Creating You Own Reading Nook Letters
To create your DIY Reading Nook, you’ll need the following supplies:
- Wood Letters
- Modge Podge
- Scissors
- Paper *Suggestion: use well-known book titles like Dr. Seuss or super heroes from comic books to cover your reading nook letters.

{Image via Money Saving Sisters}
The best thing about this is that you can design the letters however you want!
Instructions
Once you have your letters picked out, select a few paper options you like to cover each letter. You can even use two or three different paper patterns on the same letter. Use Modge Podge to glue the paper to the front of the wooden layers. Let dry. Once the letters are dry and the paper has stuck to the letter, carefully use scissors or an Exacto knife to cut around the reading nook letters trimming off the excess paper. Optional: Follow these same steps on the sides and back of the wooden letter.

{Image via Cherished Bliss}
To hang your reading nook letters you can use a variety of different methods. We like the idea of using velcro strips on the back of the letters; that way your kiddos can pull them off the wall or shelf and play with the letters. They can rearrange the letters to form different words too - how many new words can they form using R - E - A - D? This is a great way to use the letters as a learning tool and as decoration for their reading nook.

{Image via Thrifty TS Treasures}
Have design or reading advice you’d like to share with us? We’d love to hear from you and share your comments with our Hapari community.
Interested in more posts like this? Check out these posts: House Plants and Succulents,Unique Home Accessories,Summer Reading List.


Tankini Tops Explained – How to Pick the Right Style for Your Body Shape
Objective The objective of this blog is to help women to understand how various tankini tops can be worn with different body types, so that shopping for swimwear is more... Read More


6 Essential Swimwear Pieces You Need This Summer
Objective The goal of this blog is to help women make smart, confident swimwear choices by focusing on comfort, coverage, and real summer needs rather than short‑term trends. By breaking... Read More


The Ultimate Guide to Tankini Tops – How to Find the Style That Fits Your Body
Objective This guide is written to help women understand the ways tankini styles work for different physique shapes and styles, as well as comfort requirements and preferred coverage. The focus... Read More